I didn't create a HUGE list of gifts that I 'had' to make. One project I made was a couple of pillowcases - one for me and one for Mr. Inspiring........... They really got me into the Christmas mood! I found a tutorial in Pinterest, and then somehow I lost it........ I think somewhere I saw that these pillowcases were called 'sausage' cases??
Well, now Valentines Day is close and I've decided that I might like to try to make pillowcases for us for every holiday and/or season. So here is my Valentine edition.
Mr. Inspiring and I went to the fabric store last weekend. I found these fabrics...... Actually, they probably wouldn't have been my first choices, but when you wait til nearly the last minute, Hobby Lobby tends to sell out quickly and there wasn't much left to choose from.

First, you need to pick out 3 fabrics. One will be your main fabric - the part that you put your head on. We'll call that 'A'. Then you need a piece of trim, 'B'. And the end, the contrast piece, we'll call 'C'.
For each standard pillowcase, you'll need to cut:
A = 24" x 41" (for King size pillows: 32" x 41")
B = 3" x 41" (Same for King)
C= 12" x 41" (Same for King)
At this point, I press all the pieces. Then you want to press 'B' in half, long-ways.

To assemble:
Lay 'C' on your table, right side up.
Lay your trim piece 'B' next, cut side at the top, even with the top long cut side of 'C'.

Lay piece 'A', FACE DOWN, a long cut side lined up with the other 2 pieces of fabric.

Next, kind of roll piece 'A' up from the bottom, enough that you can fold 'C' over it to meet the top, but keep the rolled part of 'A' far away enough from the top that you don't pin it and sew it.

Fold the bottom of 'C' over everything and pin all the pieces along the top edge. You should only have 5 cut edges that you're pinning. No folded or rolled edges.

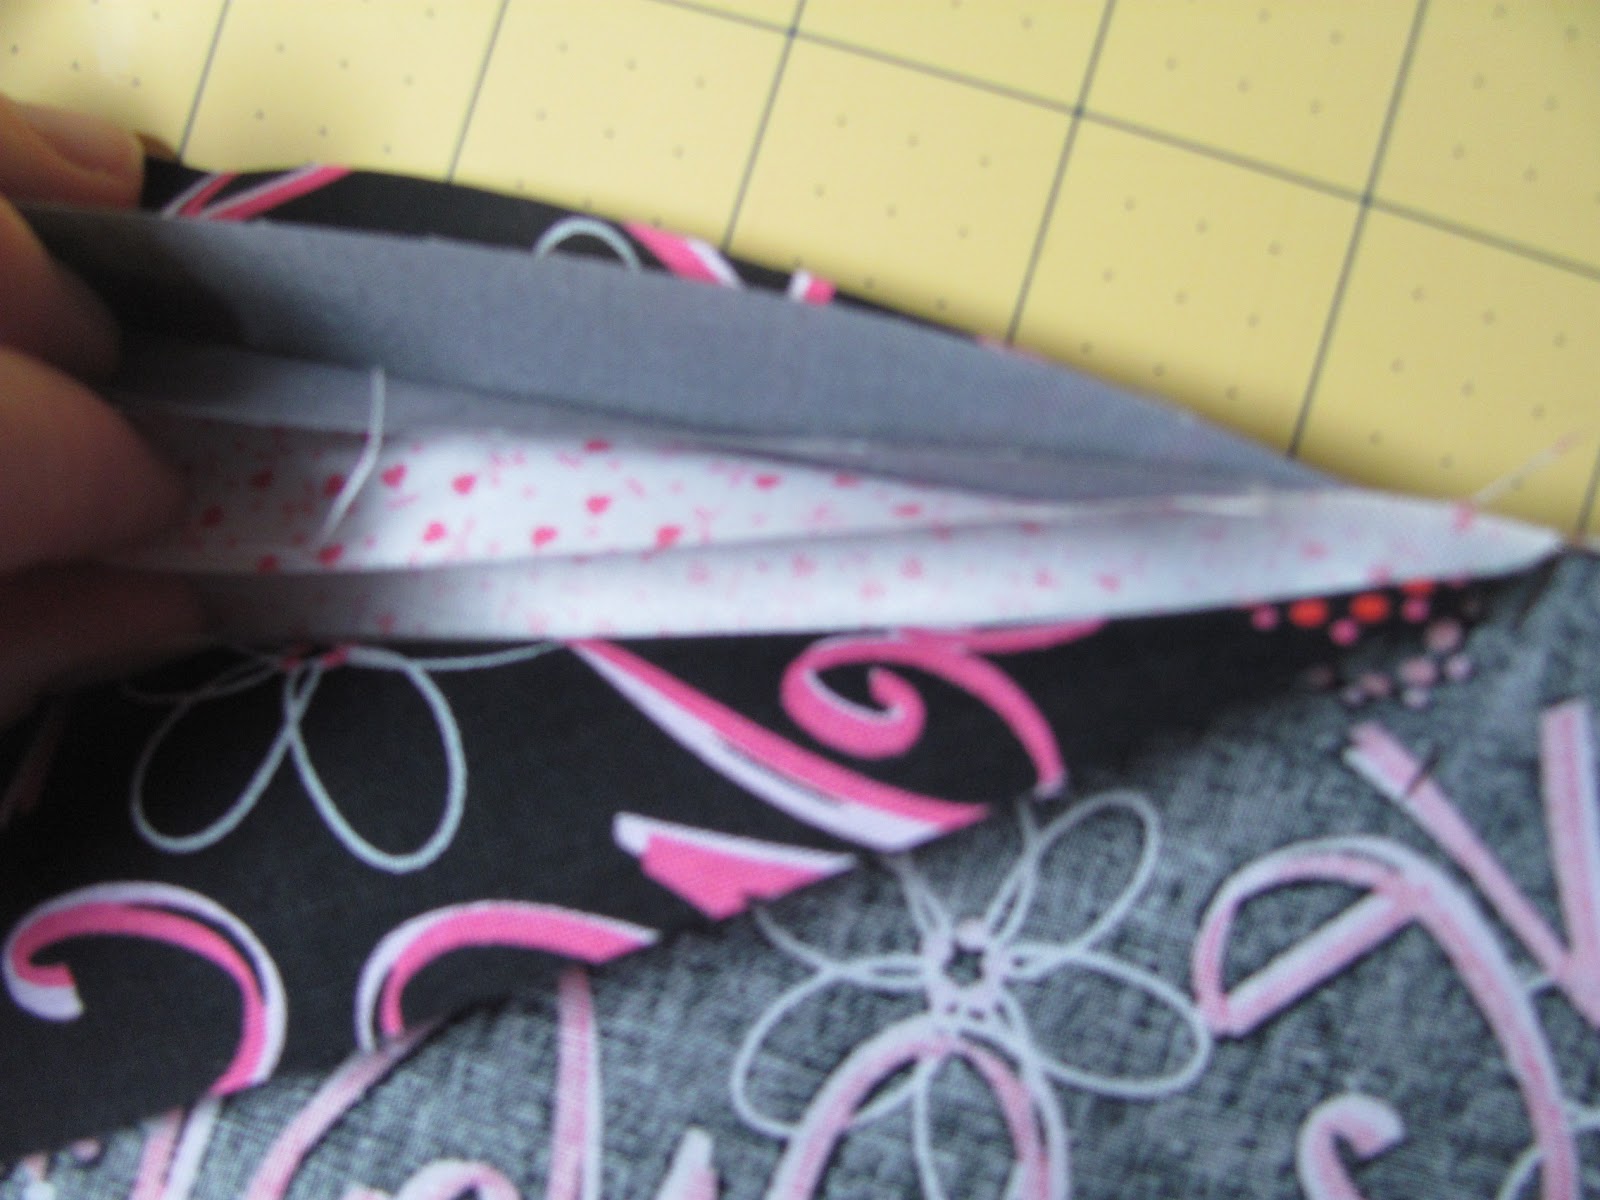
With a 1/4" seam allowance, stitch the lenth of the fabrics.
Turn the pieces right side out by pulling and unrolling all at the same time. You'll find that you now have a hidden seam. (Isn't that cool??)


Next, trim the side ends so that all three pieces are all the width of the main fabric.

Fold the pillowcase together, right side out. Pin it (if you want, at this step I usually don't) and stitch around the edge. You'll want your seam allowance to be less of a 1/4" because we're going to put a clean seam on this part, too. Stitch the cut edges (see my picture).

Turn inside out and work your corners to try to get a good 'square' corner. It helps to press when you're working these corners and seams to help make them all straight and even. Sometimes the fabric is rather uncooperative. I've found that if I kind of roll the seam with my left hand as I'm ironing with my right, I can get a flatter, straighter seam.
Next, stitch around the edges you just stitched, only you'll be stitching the wrong side of the fabric. This step will make the 'clean' seam.

Turn right-side-out, trim your threads, and voila - - You've got your pretty pillowcase!!

Oh - and I just had to show you my supervisors for the day. They were making absolute sure I was doing everthing right............

They love helping me in my craft room!! They are in their favorite spot of all!
I hope everyone is having a SUPER Super Bowl Sunday!!
Hugs ~~ Suz
I'm posting this project at these parties!!